
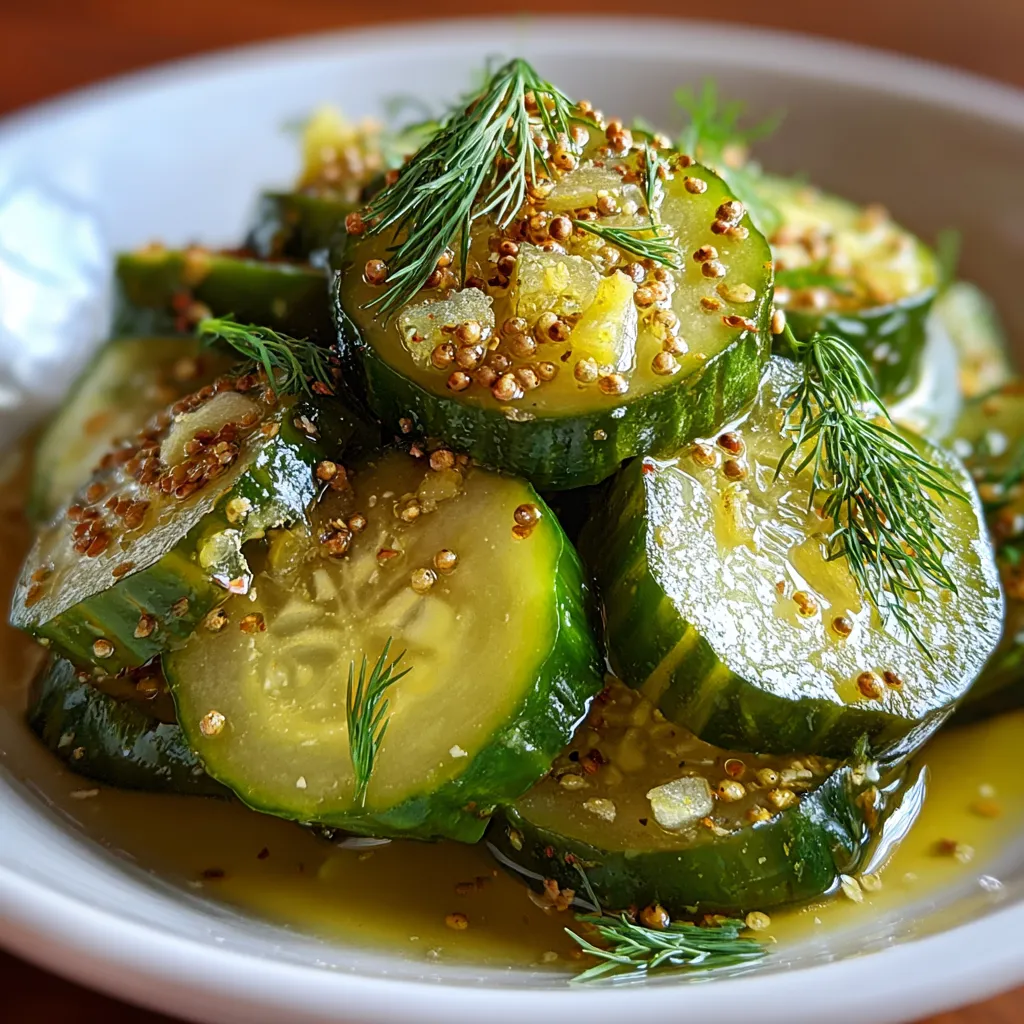
Crunchy, tangy, and unbelievably easy, No-Cook Refrigerator Pickles let crisp cucumber rounds soak up a zesty blend of vinegar, garlic, and fresh dill without ever turning on the stove. In just minutes of prep and a few hours in the fridge, you’ll have snackable pickles bursting with herbal freshness—perfect for burgers, boards, or solo munching. Grab your jar, get slicing, and discover how simple homemade pickles can elevate your snacking game!
Key Ingredients
Before you dive in, let’s gather the simple components that make these refrigerator pickles shine:
- 2 cups cucumbers, sliced: Crisp foundation that soaks up the tangy brine while delivering refreshing crunch.
- 1 cup white vinegar: Provides the essential acidic tang that pickles and preserves the cucumbers.
- 1 cup water: Dilutes the vinegar to balance acidity and prevent overpowering sharpness.
- 2 tablespoons granulated sugar: Adds a touch of sweetness to mellow the vinegar’s bite.
- 1 tablespoon kosher salt: Draws out moisture from cucumbers and enhances overall flavor.
- 2 cloves garlic, sliced: Infuses a savory, aromatic depth into the brine.
- 1 teaspoon mustard seeds: Delivers subtle heat and a gentle nutty flavor.
- 1 teaspoon black peppercorns: Adds robust spice and complexity to each bite.
- 4 sprigs fresh dill: Provides a fresh, herbal note that defines classic pickle flavor.
How To Make No-Cook Refrigerator Pickles
This no-fuss method requires minimal prep but delivers maximum crunch and flavor. You’ll whisk together a simple brine, layer in aromatics, and let the fridge work its magic. Within hours, you’ll have pickles that are crisp, tangy, and perfect for snacking or serving alongside your favorite dishes.
1. Wash the cucumbers under cold running water to remove any dirt or wax. Use a sharp knife to slice them into 1/4-inch rounds, ensuring uniform thickness for even pickling.
2. In a medium bowl, combine the white vinegar, water, granulated sugar, and kosher salt. Whisk vigorously until the sugar and salt have completely dissolved to create a balanced brine.
3. Stir the sliced garlic, mustard seeds, and black peppercorns into the brine, distributing the aromatics evenly for maximum flavor infusion.
4. Pack the cucumber rounds and fresh dill sprigs tightly into a sterilized glass jar, leaving a little headspace at the top.
5. Carefully pour the brine mixture over the cucumbers and dill, making sure each slice is fully submerged to prevent spoilage.
6. Seal the jar with a tight-fitting lid and refrigerate for at least 4 hours—though an overnight rest (8–12 hours) yields the best crunch and flavor.
Serving Suggestions
These bright, crunchy pickles are wildly versatile and can instantly lift any meal. Here are a few favorite ways to showcase their tangy flair:
- Classic burger topper: Layer 2–3 pickle slices on a juicy beef or veggie burger for a burst of acidity and crunch.
- Charcuterie board accent: Arrange pickles alongside cheeses, cured meats, and crackers to cut through rich flavors.
- Sandwich upgrade: Add strips of pickles to cold-cut sandwiches or wraps for extra tang.
- Salad garnish: Chop pickles into quarters and sprinkle over potato or pasta salads for a refreshing bite.
Tips For Perfect No-Cook Refrigerator Pickles
These no-cook pickles are practically foolproof, but a few extra pointers will ensure every bite is as crisp and flavorful as possible. From ingredient quality to flavor tweaks, these friendly tips help you customize and perfect your brine.
- These pickles will keep in the refrigerator for up to 2 weeks.
- Use fresh, firm cucumbers for the best crunch.
- Adjust the sugar and salt levels to suit your taste.
- Try adding red pepper flakes or coriander seeds for extra flavor.
How To Store It
Proper storage is key to maintaining that satisfying crunch and tangy punch. With a few simple steps, you’ll extend the life of your pickles and keep them tasting fresh.
- Refrigerate promptly: Store the sealed jar in the back of the fridge where the temperature is most consistent.
- Use clean utensils: Always remove pickles with a clean fork or tongs to prevent introducing bacteria.
- Maintain brine coverage: Ensure cucumbers remain fully submerged; top up with extra vinegar-water solution if needed.
- Label and date: Mark the jar with the prep date to track freshness and consume within two weeks.
Frequently Asked Questions
Got questions about these speedy fridge pickles? Here are answers to the most common queries:
- Q: How long does it take for the pickles to develop full flavor?
A: The pickles need at least 4 hours in the refrigerator to start absorbing the brine, but for optimal flavor and crunch, it’s best to let them sit overnight (8–12 hours).
- Q: Can I use a different type of cucumber?
A: Yes, you can use Persian, English, or Kirby cucumbers. Just make sure they are fresh and firm; the thinner skin of Persian and English cucumbers means crisper slices, while Kirby cucumbers give a slightly firmer bite.
- Q: What happens if I change the sugar or salt amounts?
A: Adjusting sugar or salt affects both taste and preservation. Reducing sugar will make the pickles tarter, while increasing salt intensifies the savory note and can enhance crispness. Always dissolve any changes thoroughly in the vinegar-water mixture before pouring over cucumbers.
- Q: Do I need to blanch or cook the cucumbers before pickling?
A: No cooking or blanching is required. This no-cook method preserves the cucumbers’ natural crunch and fresh flavor. Simply slice, pack into a jar, and cover with the cold brine.
- Q: How should I store these pickles and how long will they last?
A: Store the sealed jar in the refrigerator. They will stay safely pickled and crunchy for up to two weeks. Always use a clean fork or tongs to remove slices to prevent contamination.
- Q: Can I add other spices or aromatics to the brine?
A: Absolutely. Red pepper flakes will add heat, coriander seeds bring a citrusy note, and a few peppercorns deepen the spice profile. Just add them alongside the garlic, mustard seeds, and dill when stirring together the brine.
- Q: Why do we use kosher salt instead of table salt?
A: Kosher salt has larger, coarser crystals and no anti-caking agents, leading to a cleaner taste and easier measurement by volume. If you only have table salt, reduce the amount by about half to avoid over-salting.
What Makes This Special
What really sets these No-Cook Refrigerator Pickles apart is their sheer simplicity—no boiling water baths or lengthy canning processes, just fresh ingredients and patience in the fridge. Their crisp texture, bright acidity, and herbal pop make every snacking moment a delight. Plus, they’re insanely adaptable: sprinkle on tacos, layer in sandwiches, or munch straight from the jar. Feel free to print this article, stick it on your fridge, and save it for later. Let me know how they turned out or drop any questions below—I’m here to help you pickle like a pro!
Print
No-Cook Refrigerator Pickles
- Prep Time: 10 mins
- Total Time: 10 minutes
- Yield: 4 servings
- Category: Side Dishes
Description
Crisp cucumber slices soak up a zesty mix of vinegar, garlic, and dill for crunchy bites that burst with tangy, herbal freshness straight from the fridge.
Ingredients
- 2 cups cucumbers sliced
- 1 cup white vinegar
- 1 cup water
- 2 tablespoons granulated sugar
- 1 tablespoon kosher salt
- 2 cloves garlic sliced
- 1 teaspoon mustard seeds
- 1 teaspoon black peppercorns
- 4 sprigs fresh dill
Instructions
- Wash cucumbers and slice into 1/4-inch rounds.
- In a bowl, whisk together vinegar, water, sugar, and salt until dissolved.
- Stir in garlic, mustard seeds, and peppercorns.
- Pack cucumber slices and dill sprigs tightly into a clean glass jar.
- Pour the brine over cucumbers, ensuring they are fully submerged.
- Seal the jar and refrigerate for at least 4 hours, preferably overnight.
Notes
- These pickles will keep in the refrigerator for up to 2 weeks.
- Use fresh, firm cucumbers for the best crunch.
- Adjust the sugar and salt levels to suit your taste.
- Try adding red pepper flakes or coriander seeds for extra flavor.