
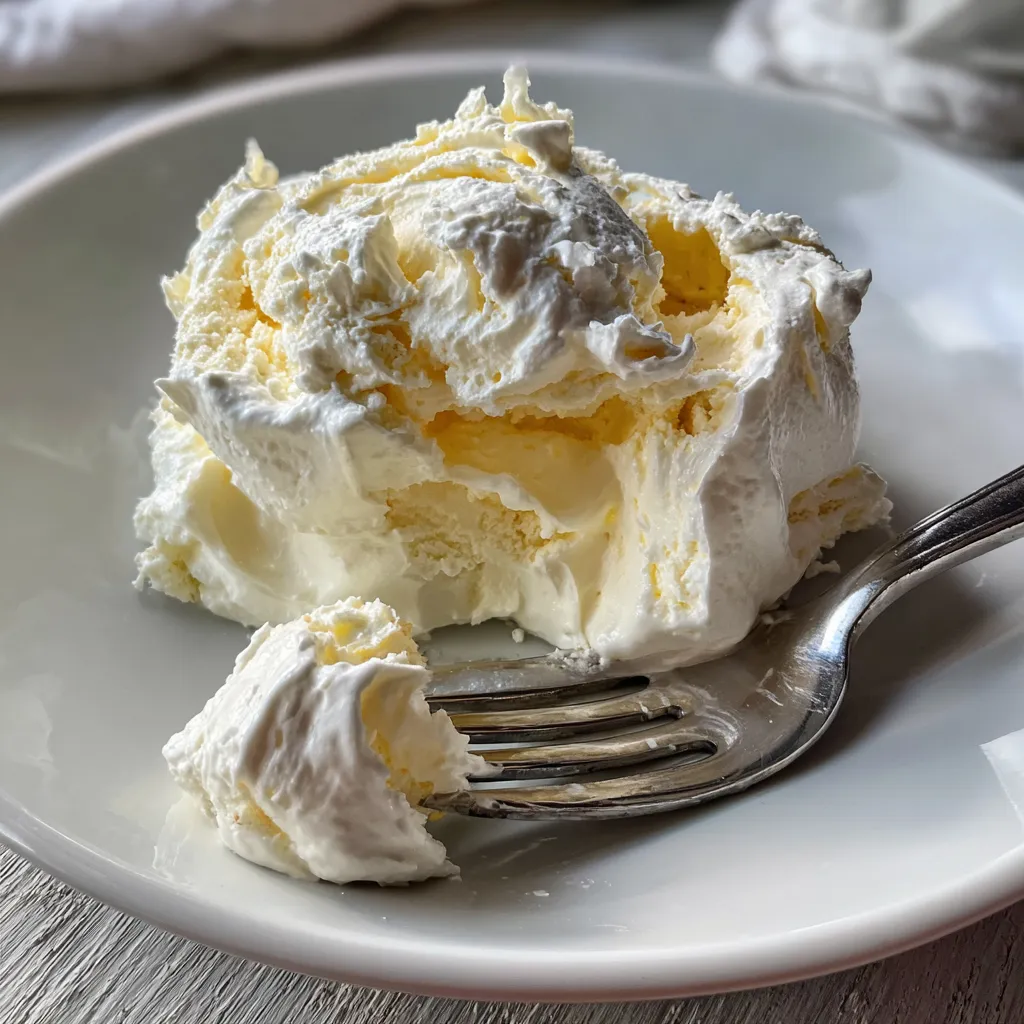
Ice Cream in a Bag is a delightful hack that lets you whip up frozen vanilla ice cream in a bag with simple pantry staples and a pinch of rock salt, no churner or freezer tray needed. Just shake and serve for a sweet, dreamy scoop you make yourself in minutes.
Key Ingredients
Here’s what you’ll need to turn a few basic pantry items into homemade ice cream magic:
- 1 cup heavy cream: provides the rich, creamy base that gives the ice cream its smooth texture.
- 1 cup whole milk: thins the mixture slightly for scoopable softness and balances the richness.
- 2 tablespoons granulated sugar: sweetens the mix and helps achieve the right consistency.
- 1 teaspoon vanilla extract: brings warm, aromatic vanilla flavor to every bite.
- 4 cups ice: chills the sealed bag and initiates the freezing process around the ice cream mixture.
- 1/2 cup rock salt: lowers the freezing point of ice so your ice cream mixture freezes quickly and evenly.
How To Make Ice Cream in a Bag
Shaking up your own ice cream is as fun as it sounds! With just two bags and a bit of elbow grease, you’ll transform liquid ingredients into soft-serve bliss. Make sure you’re using sturdy, high-quality bags and that each seal is secure. Then, let the cold science begin as you gently but firmly work the salt-and-ice bath to freeze your mixture to perfection.
1. Combine ingredients: In a quart-size resealable plastic bag, pour in heavy cream, whole milk, granulated sugar, and vanilla extract. Seal the bag tightly, pressing out as much air as possible to prevent leaks.
2. Prepare the ice bath: Place the sealed quart bag inside a sturdy gallon-size resealable bag. Surround the smaller bag with 4 cups of ice and 1/2 cup of rock salt, ensuring the salt and ice are evenly distributed around the inner bag.
3. Shake vigorously: Seal the gallon bag and shake it vigorously for 5 to 10 minutes, massaging and rotating the bag so that the ice cream mixture freezes into a soft-serve consistency. Check at the 5-minute mark and continue shaking until ready.
4. Serve immediately: Remove the inner bag, carefully wipe off any salt from the exterior, open it up, and scoop out your fresh ice cream. Enjoy right away for the best texture.
Serving Suggestions
Once your ice cream is ready, the fun continues! Here are a few ideas to present and enjoy your homemade treat in style:
- Serve in chilled bowls to keep the ice cream from melting too quickly.
- Top with fresh berries for a bright, fruity contrast that complements the vanilla base.
- Drizzle with hot fudge or caramel to add an indulgent, gooey layer of flavor.
- Pair with a warm homemade brownie for the ultimate hot-and-cold dessert experience.
Tips For Perfect Ice Cream in a Bag
A few insider tweaks make all the difference when you’re shaking up this beginner-friendly dessert. From salt selection to hand protection, these practical pointers will help you achieve café-quality results and keep the process comfortable and leak-free.
- Use rock salt for faster freezing; table salt may not work as well.
- Ensure all air is squeezed out of the inner bag before sealing to prevent leaks.
- Wear oven mitts or wrap the bag in a towel while shaking to protect your hands from the cold.
- Customize your ice cream by adding mix-ins like chocolate chips, fruit, or cookie crumbs.
How To Store It
If you have leftovers—or want to prepare a batch in advance—proper storage keeps your ice cream tasting its best. Follow these simple methods to maintain that fresh, scoopable texture and avoid ice crystals:
- Airtight container: Transfer your ice cream into a lidded, freezer-safe container to prevent freezer burn.
- Press a layer of plastic wrap directly onto the surface before sealing the lid to minimize air exposure.
- Freeze flat by placing the container on a level shelf, which helps maintain a smooth consistency.
- Thaw slightly at room temperature for 5 minutes before scooping to achieve a perfect, scoopable texture.
Frequently Asked Questions
Curious about the shaking process or ingredients? Here are answers to some of the most common questions:
- How long should I shake the bags to achieve the right ice cream consistency?
Shake the bag vigorously for 5 to 10 minutes, checking at the 5-minute mark; continue until the mixture reaches a soft-serve texture. Shaking time varies with ice temperature and bag tightness.
- Why is rock salt recommended instead of table salt?
Rock salt lowers the freezing point of ice more effectively than table salt, allowing the ice cream mixture to freeze faster and more evenly. Table salt can work, but it will take significantly longer and may yield a softer texture.
- How can I prevent leaks during the shaking process?
Squeeze out all excess air from the inner quart bag before sealing, then place it inside a sturdy gallon bag. Double-bagging and removing air helps prevent bursting. Inspect the seals before shaking to ensure they are fully closed.
- Can I customize this recipe with mix-ins or flavor variations?
Yes, you can gently fold in mix-ins like chocolate chips, fruit pieces, or cookie crumbs after the ice cream reaches a soft-serve consistency. For evenly distributed mix-ins, shake the bag briefly for another minute after adding them.
- What should I do if my hands get too cold while shaking the bag?
Wear oven mitts, thick gloves, or wrap the bag in a kitchen towel to insulate your hands. The salt-ice mixture can become very cold, and protective covering prevents discomfort and potential frostbite.
- How should I store any leftover ice cream?
Transfer leftovers to an airtight container and freeze for up to two weeks. Thaw slightly at room temperature for a few minutes before scooping to achieve a scoopable consistency similar to traditional ice cream.
- Can I use alternative milks or non-dairy creams in this recipe?
You can substitute with coconut milk or almond milk and use a plant-based cream alternative, but the final texture may be less creamy. Adjust sugar levels to taste and expect a slightly softer or icier consistency.
What Makes This Special
This playful, hands-on recipe combines a bit of kitchen science with pure fun, delivering creamy vanilla ice cream without a machine. It’s perfect for beginners, kids’ cooking projects, or anyone who loves a quick, interactive dessert. Shake in your favorite mix-ins, serve it up fresh, then print and save this guide for repeat fun! Feel free to drop a comment below if you try it out or have any questions—I’m here to help every scoop of the way.
Print
Ice Cream in a Bag
- Prep Time: 5 mins
- Cook Time: 10 mins
- Total Time: 15 minutes
- Yield: 4 servings
- Category: Desserts
Description
Shake up sweet vanilla ice cream in a plastic bag and taste the cold, smooth, dreamy scoop you made yourself in minutes.
Ingredients
- 1 cup heavy cream
- 1 cup whole milk
- 2 tablespoons granulated sugar
- 1 teaspoon vanilla extract
- 4 cups ice
- 1/2 cup rock salt
Instructions
- In a quart-size resealable plastic bag combine heavy cream, whole milk, granulated sugar and vanilla extract and seal tightly, squeezing out excess air.
- Place the sealed quart bag inside a gallon-size resealable plastic bag and add ice and rock salt around the smaller bag.
- Seal the gallon bag and shake vigorously for 5 to 10 minutes until the mixture reaches a soft-serve ice cream consistency.
- Remove the inner bag, wipe off any salt from the outside, then open and serve the ice cream immediately.
Notes
- Use rock salt for faster freezing; table salt may not work as well.
- Ensure all air is squeezed out of the inner bag before sealing to prevent leaks.
- Wear oven mitts or wrap the bag in a towel while shaking to protect your hands from the cold.
- Customize your ice cream by adding mix-ins like chocolate chips, fruit, or cookie crumbs.