
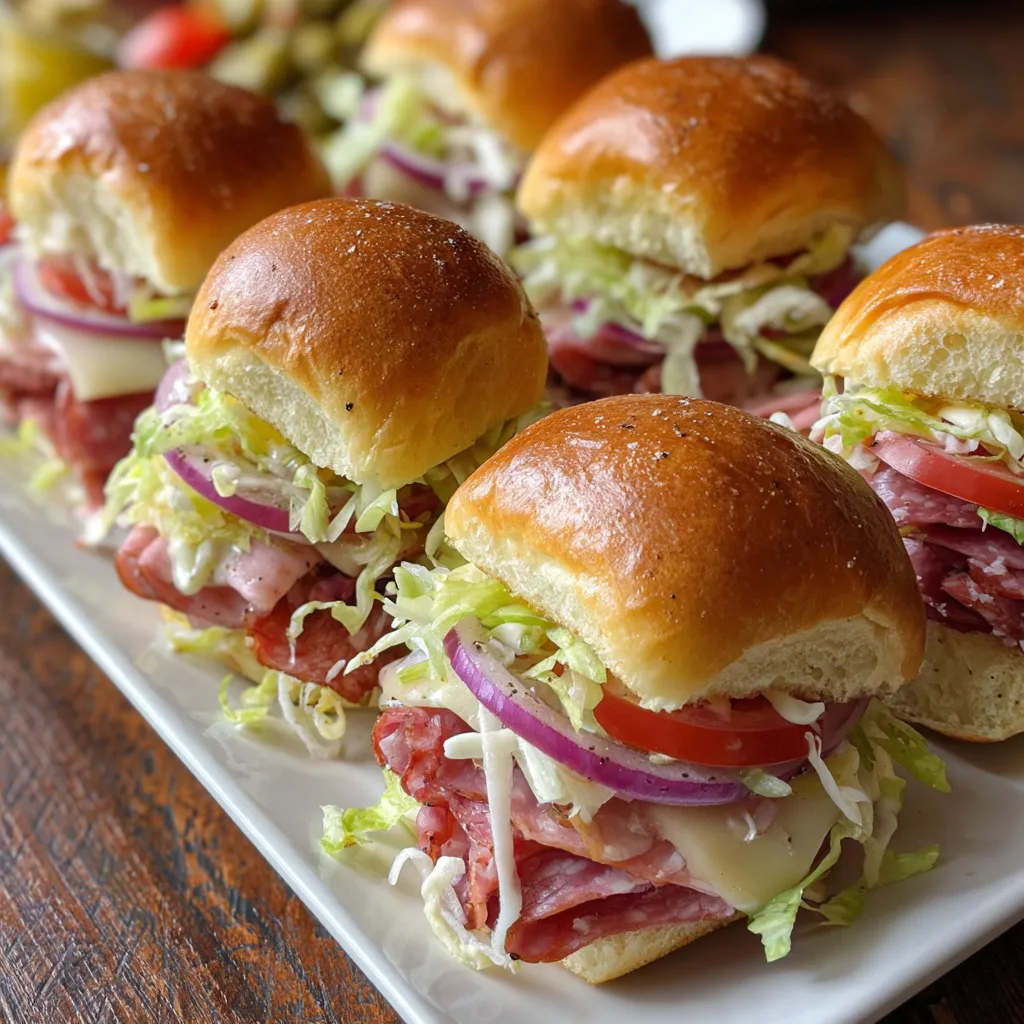
These Italian Grinder Sliders are little bites of heaven that pack savory Italian cold cuts, gooey provolone, and crisp veggies all into buttery toasted buns. With a bright, tangy vinaigrette-soaked bed of lettuce, tomato, and onion, every mouthful hits just the right balance. Perfect for game days, parties, or an easy weeknight treat, this beginner-friendly recipe comes together in under 25 minutes. Grab your ingredients, call your friends, and get ready to indulge in these handheld Italian classics—your guests will be asking for more!
Key Ingredients
Here’s what you’ll need to assemble these Italian Grinder Sliders with all the classic flavors in bite-sized form.
- 12 slider buns: Soft and sturdy base that holds all the fillings and toasts beautifully.
- 8 ounces Genoa salami: Savory cured meat that adds a rich, slightly spicy flavor.
- 8 ounces deli ham: Tender protein that balances the saltiness of the salami.
- 8 ounces provolone cheese slices: Melts into creamy goodness and binds the layers together.
- 2 cups shredded lettuce: Adds a crisp, refreshing crunch beneath the warm meats.
- 1 medium tomato, thinly sliced: Introduces juicy sweetness and tang.
- 1 small red onion, thinly sliced: Brings a sharp, zesty bite to each slider.
- 12 pepperoncini, sliced: Offers a tangy, mildly spicy kick for contrast.
- 2 tablespoons mayonnaise: Creates a creamy barrier to keep buns from getting soggy.
- 1 tablespoon olive oil: A silky component in the vinaigrette for flavor and moisture.
- 1 tablespoon red wine vinegar: Adds bright acidity to cut through the richness.
- 1 teaspoon Italian seasoning: A blend of herbs that infuses classic Italian aroma.
- 2 tablespoons unsalted butter, melted: Brushed on top buns for golden color and flavor.
- Salt to taste: Enhances all the individual flavors.
- Freshly ground black pepper to taste: Provides a finishing touch of mild heat.
How To Make Italian Grinder Sliders
Making these sliders is a breeze once you have all the ingredients prepped. You’ll build each slider by layering savory meats, cheese, and fresh veggies on toasted buns, all brought together by a zesty vinaigrette and garlic butter finish. Follow the steps below to assemble and bake a platter of irresistible Italian Grinder Sliders that are perfect hot off the oven.
1. Preheat the oven to 350°F, positioning a rack in the center, and line a baking sheet with parchment paper for easy cleanup.
2. Slice each slider bun horizontally into top and bottom halves, then use a spatula to spread mayonnaise evenly across all the bottom pieces.
3. In a small bowl, vigorously whisk together olive oil, red wine vinegar, and Italian seasoning until emulsified, and pour this tangy vinaigrette over the mayo-coated buns.
4. Arrange layers of Genoa salami, deli ham, and provolone on each bottom bun, stacking neatly to ensure every bite is balanced.
5. Pile shredded lettuce, tomato slices, red onion rings, and pepperoncini atop the meats so the sliders stay bright and crunchy.
6. Crown each slider with its top bun half and use a brush to coat the tops with melted unsalted butter, which will toast into a golden, crispy lid.
7. Bake the sliders for 5 to 7 minutes, or until the cheese is fully melted and the buns are lightly toasted, then season with salt and freshly ground black pepper and serve immediately.
Serving Suggestions
When these Italian Grinder Sliders come out of the oven, it’s time to dress them up for presentation. Whether you’re hosting a casual get-together or craving a fun weeknight dinner, these serving ideas will take your sliders to the next level.
- Serve on a wooden platter stacked high and garnish with fresh basil leaves for a rustic Italian vibe.
- Pair with crispy potato chips or seasoned fries to add a satisfying crunch alongside your sliders.
- Offer a side of marinated olives and pickled vegetables to complement the tangy pepperoncini.
- Place small bowls of the leftover vinaigrette for guests to drizzle extra acidity over each slider.
Tips For Perfect Italian Grinder Sliders
A few friendly pointers will help you nail these sliders every time. With just a bit of prep and the right ingredients, you’ll be sliding these onto plates in no time.
- Use a mix of Italian cured meats like mortadella or capicola for extra depth of flavor.
- Prepare the vinaigrette and vegetables ahead of time for faster assembly.
- Store leftovers in an airtight container in the refrigerator for up to two days.
- Reheat in a 350°F oven for 5 minutes to keep the buns crisp.
How To Store It
Whether you have sliders leftover or want to prep ahead, storing these mini sandwiches properly will keep them tasting fresh and delicious.
- Cool completely: Let sliders come to room temperature before packing to avoid condensation and sogginess.
- Use an airtight container: Seal them tightly to lock in flavor and prevent fridge odors for up to two days.
- Layer with parchment paper: Place sheets between sliders to keep each one neat and prevent sticking.
- Store in the coldest part of the fridge: Keep the container toward the back shelf for consistent chill and maximum freshness.
Frequently Asked Questions
Here are a few quick answers to common questions about Italian Grinder Sliders:
- How long does it take to prepare and bake Italian Grinder Sliders?
It takes about 15 minutes to assemble the sliders and 5 to 7 minutes to bake in a preheated 350°F oven, so roughly 20 to 22 minutes total. Prep time includes slicing buns and vegetables, whisking the vinaigrette, and layering the meats and cheese.
- Can I substitute or add different meats and cheeses?
Yes. You can swap or mix in Italian cured meats like mortadella or capicola for additional depth, and use cheeses such as mozzarella or fontina instead of provolone. Just keep the total meat and cheese quantity around 24 ounces to fit 12 slider buns.
- How can I prevent the slider buns from becoming soggy?
Spread a thin layer of mayonnaise on the bottom buns and drizzle the olive oil, red wine vinegar, and Italian seasoning vinaigrette sparingly. Brush the top buns with melted butter before baking; these steps create a moisture barrier and help the buns toast lightly in the oven.
- What’s the best way to prepare components in advance?
You can slice the tomatoes and onions, shred the lettuce, and mix the vinaigrette up to one day ahead. Store the veggies in airtight containers and the vinaigrette in the refrigerator. Assemble and bake the sliders just before serving to keep buns crisp.
- How should I store and reheat leftover sliders?
Store cooled sliders in an airtight container in the refrigerator for up to two days. To reheat, place them on a baking sheet in a 350°F oven for about 5 minutes, or until warmed through and the buns regain their crispness.
- Can I make the sliders spicier or adjust the flavor profile?
Absolutely. Increase the heat by adding more sliced pepperoncini, drizzling hot pepper oil into the vinaigrette, or using spicier cured meats like Calabrese salami. You can also experiment with fresh herbs like basil for added freshness.
- What adjustments are needed if I use larger buns or fewer sliders?
If you use larger buns, reduce the filling per slider to avoid overstuffing. For fewer sliders, simply scale down each ingredient proportionally—about 2 ounces of meat, 2 slices of cheese, and a scoop of vegetables per slider.
What Makes This Special
These Italian Grinder Sliders hit all the right notes – savory cured meats, melty cheese, crisp veggies, and a zingy vinaigrette are an unbeatable combo in every bite. Their slider size makes them perfect for dipping, sharing, or sneaking two at a time without judgment. If you ever needed an excuse to stock up on Italian cold cuts, this is it! Feel free to print this recipe out, tuck it in your cookbook, and keep it handy for your next get-together. I can’t wait to hear how yours turned out, so drop a comment or question if you give it a spin.
Print
Italian Grinder Sliders
- Prep Time: 15 mins
- Cook Time: 7 mins
- Total Time: 22 minutes
- Yield: 12 servings
- Category: Appetizers
Description
These warm sliders layer Genoa salami, ham and melted provolone on soft buns brushed with garlic butter. A bright vinaigrette-soaked bed of crisp lettuce, tomato and onion adds tang to every bite.
Ingredients
- 12 slider buns
- 8 ounces Genoa salami
- 8 ounces deli ham
- 8 ounces provolone cheese slices
- 2 cups shredded lettuce
- 1 medium tomato thinly sliced
- 1 small red onion thinly sliced
- 12 pepperoncini sliced
- 2 tablespoons mayonnaise
- 1 tablespoon olive oil
- 1 tablespoon red wine vinegar
- 1 teaspoon Italian seasoning
- 2 tablespoons unsalted butter melted
- Salt to taste
- Freshly ground black pepper to taste
Instructions
- Preheat the oven to 350°F and line a baking sheet with parchment paper.
- Slice the slider buns horizontally and spread mayonnaise evenly on the bottom halves.
- In a small bowl whisk together olive oil, red wine vinegar and Italian seasoning, then drizzle over the bottom buns.
- Layer salami, ham and provolone on each bun, then top with shredded lettuce, tomato, red onion and pepperoncini.
- Place the top halves of the buns over the sliders and brush the melted butter over the tops.
- Bake the sliders for 5 to 7 minutes until the cheese is melted and the buns are lightly toasted.
- Remove from the oven, season with salt and pepper and serve warm.
Notes
- Use a mix of Italian cured meats like mortadella or capicola for extra depth of flavor.
- Prepare the vinaigrette and vegetables ahead of time for faster assembly.
- Store leftovers in an airtight container in the refrigerator for up to two days.
- Reheat in a 350°F oven for 5 minutes to keep the buns crisp.