
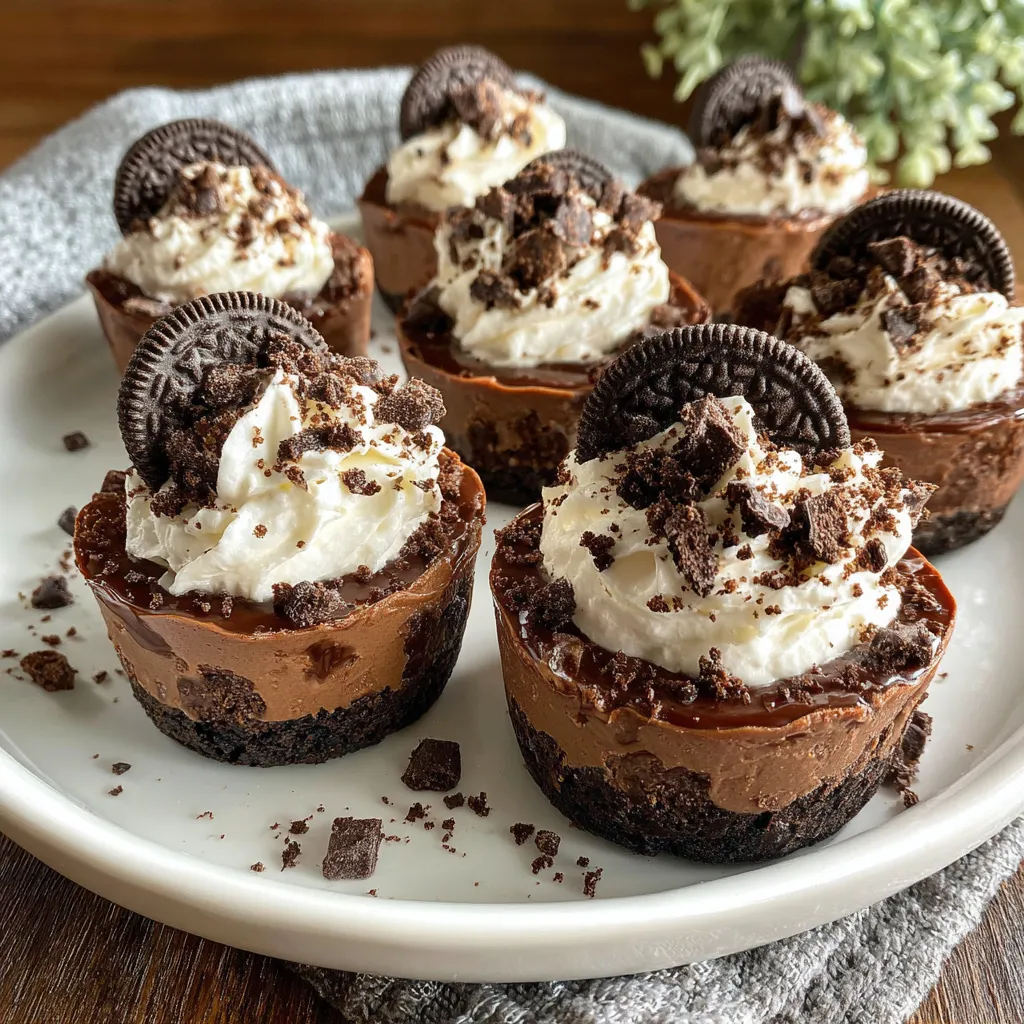
No-Bake Creamy Chocolate Dirt Cups are the ultimate no-fuss dessert for anyone craving a playful yet decadent treat. Velvety chocolate layers mingle with crunchy cookie crumbs in every spoonful, crowned by gummy worms for a whimsical twist. Cream cheese and whipped topping meet rich chocolate pudding in fluffy layers, punctuated by crunchy Oreo crumbs and playful gummy worms. Trust me, once you dive into these chilled “mud cups,” you’ll be hooked—and your guests will be begging for the recipe!
Key Ingredients
Before we dig in, let’s round up all those pantry staples and playful add-ins that make these dirt cups so irresistible:
- 8 ounces cream cheese, softened: Provides a rich, tangy base that balances the sweetness in each layer.
- 1/3 cup granulated sugar: Sweetens the cream cheese mixture and helps it whip up silky-smooth.
- 1 teaspoon vanilla extract: Adds warm, aromatic depth to the creamy filling.
- 2 packages instant chocolate pudding mix: Forms the lush, chocolatey “mud” layers.
- 2 cups milk: Hydrates and thickens the pudding for that perfect scoopable texture.
- 8 ounces whipped topping, thawed: Lightens the filling and creates fluffy, dreamy layers.
- 15 Oreo cookies, crushed: Delivers crunchy “dirt” layers that contrast beautifully with creamy filling.
- 12 gummy worms: The playful finale—perfect for that sweet, chewy pop of color.
How To Make No-Bake Creamy Chocolate Dirt Cups
Ready to roll up your sleeves? This recipe comes together in a few no-bake steps and delivers big on fun. You’ll start by whipping up two creamy mixtures, layering them with Oreo crumbs, and finishing with gummy worms. The process is straightforward and forgiving—perfect for beginner bakers or busy hosts. Just grab your mixing bowls, spoons, and serving cups, and let’s get layering!
1. In a large mixing bowl, beat the softened cream cheese, granulated sugar, and vanilla extract with an electric mixer until completely smooth and lump-free.
2. In a separate bowl, whisk the instant chocolate pudding mix with cold milk for about 2 minutes until it thickens into a silky, pourable consistency.
3. Gently fold the thawed whipped topping into the cream cheese mixture using a rubber spatula, taking care to keep it light and airy.
4. Carefully fold the prepared pudding into the cream cheese–whipped topping blend until you have one uniform chocolate cream.
5. Divide half of the crushed Oreo cookies among individual serving cups to create your first “dirt” layer at the bottom.
6. Spoon half of the chocolate cream mixture over the cookie crumbs, spreading it evenly to the edges.
7. Repeat with the remaining Oreo crumbs and chocolate cream, building a second layer of dirt and mud.
8. Top each cup with two gummy worms poking out of the “soil,” then chill in the refrigerator for at least 1 hour before serving to let everything set.
Serving Suggestions
These dirt cups are a playful centerpiece all on their own, but with a few simple tweaks, you can make them even more memorable. Serve them chilled, straight from the fridge, in clear glass cups for maximum visual impact—those layers look amazing against a backdrop of gleaming chocolate. For an extra touch, place a small spoon in each cup for easy digging action. Whether you’re hosting a kids’ birthday party or an adult dessert bar, these cups fit right in with minimal fuss and maximum smiles.
- Arrange in mini mason jars for a rustic, Instagram-worthy presentation.
- Garnish with fresh mint leaves for a pop of green and a hint of freshness.
- Drizzle with melted chocolate or caramel sauce for added decadence.
- Serve alongside iced coffee or milkshakes to balance the sweetness.
Tips For Perfect No-Bake Creamy Chocolate Dirt Cups
These creamy chocolate dirt cups are as fun to make as they are to eat, but a few insider tricks will take your game to the next level. First, always start with soft cream cheese—it blends so much more easily, giving you smoother layers without lumps. When folding, use a gentle under-and-over motion to keep the whipped topping light and fluffy. Chilling time is key: it allows the layers to set firmly, so your cups hold their shape when scooped. And don’t hesitate to play with candy swaps if gummy worms aren’t your thing—you can customize these for any occasion!
- For best texture, let the cream cheese soften at room temperature before mixing.
- Swap gummy worms for other candies like mini marshmallows or chocolate chips.
- Cups can be prepared up to 24 hours in advance; cover and refrigerate.
- Use dark chocolate pudding mix for a richer chocolate flavor.
How To Store It
Proper storage keeps your dirt cups tasting fresh and looking fabulous for up to a full day. After assembling, cover each cup tightly with plastic wrap or transfer them to an airtight container to prevent any fridge odors from sneaking in. If you’re prepping in advance, chill them upright until you’re ready to serve, then add the gummy worms right before presenting for best texture. Avoid stacking cups to keep the layers pristine. With these simple steps, you’ll maintain that perfect contrast of creamy filling and crunchy cookie “dirt.”
- Refrigerate cups in an airtight container for up to 24 hours.
- Cover each cup individually with plastic wrap to prevent moisture loss.
- Chill cookie crumbs briefly before layering to keep them crisp.
- Add gummy worms right before serving for the freshest chew.
Frequently Asked Questions
Here are quick answers to common questions so your dirt cups turn out perfectly every time:
- Q: How long should I let the cream cheese soften and how can I tell it’s ready?
Let the cream cheese sit at room temperature for about 30 to 45 minutes until it yields easily to gentle pressure but still holds its shape. Properly softened cream cheese blends smoothly with sugar and vanilla, preventing lumps and ensuring a creamy base.
- Q: Can I use homemade whipped cream instead of store-bought whipped topping?
Yes. Whip 1½ cups of heavy cream with 2 tablespoons of powdered sugar and ½ teaspoon of vanilla extract until soft peaks form. Chill briefly before folding into the cream cheese mixture so it maintains its light, airy texture.
- Q: What’s the best way to mix the instant pudding so it doesn’t have lumps?
Pour the pudding mix into a bowl, add cold milk, and whisk vigorously for at least 2 minutes, making sure to scrape the sides and bottom of the bowl. A continuous, brisk whisking motion prevents pockets of dry mix and yields a silky, thick pudding.
- Q: How far in advance can I assemble the dirt cups, and what’s the best storage method?
You can assemble the cups up to 24 hours ahead. Cover each cup tightly with plastic wrap or transfer all cups to an airtight container. Refrigerate to keep the layers firm and the cookie crumbs crisp until just before serving.
- Q: What substitutions can I make for a dairy-free or lighter version of these cups?
For dairy-free, use vegan cream cheese, plant-based whipped topping, and a non-dairy milk blend. For a lighter option, swap full-fat cream cheese for Neufchâtel and use sugar-free pudding mix. The overall texture will remain creamy and delicious.
- Q: How do I keep the crushed Oreo layers from getting soggy between servings?
Make sure to chill the cookie layers briefly before adding the next cream layer. Assemble cups just before serving or store fully assembled cups in the refrigerator and serve within 24 hours to maintain the “dirt” crunch.
- Q: Why is it important to fold in the whipped topping and pudding rather than stir vigorously?
Folding gently combines ingredients without deflating the whipped topping’s airiness. Use a rubber spatula to cut through the center, lift from the bottom, and fold over the top until just combined. This preserves a light, fluffy texture in each layer.
What Makes This Special
These No-Bake Creamy Chocolate Dirt Cups are a guaranteed crowd-pleaser because they pair timeless chocolate-and-cream flavors with a dash of childhood nostalgia. The balance between smooth, fluffy layers and crunchy Oreo crumbs gives every spoonful a delightful contrast, while gummy worms add a playful pop of color. They come together in minutes—no oven required—and can be customized to suit any taste or dietary preference. Feel free to print this guide and save it for your next gathering. If you give these cups a whirl, drop a comment below or shoot me a question—I’d love to hear how they turned out!
Print
No-Bake Creamy Chocolate Dirt Cups
- Prep Time: 20 mins
- Total Time: 20 minutes
- Yield: 12 servings
- Category: Desserts
Description
Cream cheese and whipped topping meet rich chocolate pudding in fluffy layers, punctuated by crunchy Oreo crumbs and playful gummy worms. Each spoonful feels like digging into sweet, chilled mud with bursts of creamy sweetness.
Ingredients
- 8 ounces cream cheese, softened
- 1/3 cup granulated sugar
- 1 teaspoon vanilla extract
- 2 packages instant chocolate pudding mix
- 2 cups milk
- 8 ounces whipped topping, thawed
- 15 Oreo cookies, crushed
- 12 gummy worms
Instructions
- In a mixing bowl, beat the cream cheese, sugar, and vanilla until smooth.
- In a separate bowl, whisk the pudding mix and milk for about 2 minutes until it thickens.
- Gently fold the whipped topping into the cream cheese mixture until combined.
- Carefully fold the pudding into the cream cheese mixture until fully incorporated.
- Divide half of the crushed cookies among serving cups to form the first “dirt” layer.
- Spoon half of the chocolate cream mixture over the cookie crumbs.
- Repeat with the remaining cookies and chocolate cream to build a second layer.
- Top each cup with gummy worms and chill for at least 1 hour before serving.
Notes
- For best texture, let the cream cheese soften at room temperature before mixing.
- Swap gummy worms for other candies like mini marshmallows or chocolate chips.
- Cups can be prepared up to 24 hours in advance; cover and refrigerate.
- Use dark chocolate pudding mix for a richer chocolate flavor.